PLEASE TIDY MY ROOM and PLEASE DO NOT DISTURB door handle hanger:
Door Handle Hangers
Thursday, November 14, 2013
Please Tidy My Room / Please Do Not Disturb - Door handle hanger
A more significant variation this time. This is a door hanger is designed to be suitable for any serviced apartment, hotel, or motel.
PLEASE TIDY MY ROOM and PLEASE DO NOT DISTURB door handle hanger:
PLEASE TIDY MY ROOM and PLEASE DO NOT DISTURB door handle hanger:
Monday, November 11, 2013
Do Not Disturb / Please Come In - with pictures - Door handle hanger
A slight variation of the wording from the Do Not Disturb and Please Enter with pictures.
DO NOT DISTURB and PLEASE COME IN door handle hanger with pictures:
DO NOT DISTURB and PLEASE COME IN door handle hanger with pictures:
Do Not Disturb / Please Enter - Door handle hanger
The start of a fresh series of hangers. This is only a slight variation of the wording from the original. Upcoming hangers will include some more friendly images.
DO NOT DISTURB and PLEASE ENTER door handle hanger:
DO NOT DISTURB and PLEASE ENTER door handle hanger:
Tuesday, July 9, 2013
Please leave some feedback
I am now seeing traffic to this site from around the world and I am keen to continue improving the door handle hangers and adding more to the collection. Getting some feedback from users would be the best way to steer my work in the right direction. I would also be keen to hear from visitors that didn't quite find what they were looking for.
If you decide to use a door handle hanger template please take the time to add a comment or two to this site or find me on Google+. If you didn't quite find what you were looking for, let me know, maybe that can be my next project.
If you decide to use a door handle hanger template please take the time to add a comment or two to this site or find me on Google+. If you didn't quite find what you were looking for, let me know, maybe that can be my next project.
Saturday, May 18, 2013
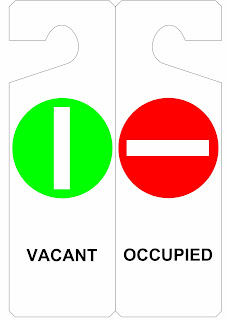
Occupied - Vacant double sided door handle hanger v1.1
Instructions: Make your door handle hanger
Door handle hanger instructions:
Print the door hanger templates, cut them out, laminate, cut them out again, and use.
or
More detailed instructions below:
Equipment required:
- Printer
- A4 paper
- Scissors
- Laminator
- Printer
- A4 paper
- Scissors
- Laminator
1. Open or save the door hanger template.
2. Print the template onto A4 size paper. Select portrait page orientation. Print in colour for full effect.
3. Use scissors to cut out the hanger/s along the marked lines. Take care to cut precisely along the lines.
4. Place or fold each half of the cut out hanger back-to-back on a single lamination sleeve. Align the halves of the cut out hanger precisely. Stick the two halves together with a glue stick to help maintain alignment and end up with a more durable hanger. Run it through the laminator inside a new lamination sleeve.
5. Use scissors to again cut out the laminated hanger beyond the hanger extents. Cut a few millimetres just outside the extents of the paper into the space where the sides of the laminator sleeve are in contact.
6. Congratulations. Your door handle hanger is ready to use.
Subscribe to:
Comments (Atom)


